
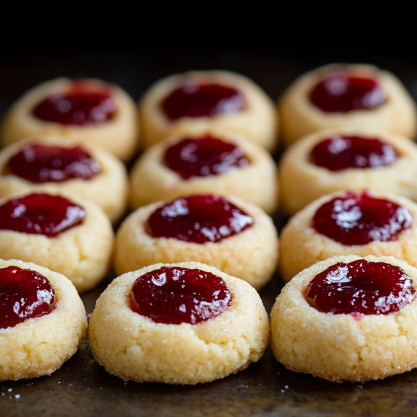
Classic Butter Thumbprint Cookies
Holiday baking is a special time for families. Butter Thumbprint Cookies are a beloved tradition. They mix buttery goodness with sweet jam, pleasing everyone from kids to grandparents.
Making the perfect thumbprint cookies is easy, even for beginners. These treats need just a few ingredients and basic tools. They turn any holiday gathering into a tasty celebration.
The beauty of these cookies is in their simplicity. A soft butter base meets a fruity preserve-filled dimple. They’re perfect for cookie exchanges or cozy nights at home.
These cookies are more than just a snack. They’re about warm memories, shared moments, and the joy of baking. They bring people together during the festive season.
What Are Butter Thumbprint Cookies?
Butter thumbprint cookies are a beloved holiday treat. They mix soft shortbread with sweet jam fillings. These cookies have won the hearts of many in the United States.
A Journey Through Cookie History
The history of jam thumbprint cookies goes back to Europe, mainly Poland and Sweden. They started with simple shortbread recipes. Bakers then added a special touch by filling the cookies with colorful fruit preserves.
- Traditional European baking techniques inspired the design
- Shortbread thumbprint cookies became popular in holiday gatherings
- Family recipes passed down through generations
Essential Ingredients That Make the Magic
Butter is key to making these cookies special. The right mix of ingredients creates a delicious experience:
- Butter: Gives rich flavor and a soft texture
- Flour: Makes the classic shortbread base
- Jam: Adds a sweet and fruity touch
- Vanilla: Boosts the overall taste
“A perfect butter thumbprint cookie is a balance of texture and taste, with a delicate shortbread base and a vibrant jam center.”
Bakers can try different jams, from raspberry to exotic fruits. This makes the cookies perfect for any time.
How to Make Butter Thumbprint Cookies
Making holiday cookies is a fun art that brings joy to kitchens everywhere. Butter thumbprint cookies are a classic that adds elegance and taste to Christmas cookie platters. They impress everyone with their simplicity and deliciousness.
Step-by-Step Cookie Preparation
Making the perfect batch of these treats needs careful attention. Follow these key steps:
- Cream softened butter and sugar until light and fluffy
- Gradually add flour to create a smooth dough
- Chill the dough for 30 minutes to enhance texture
- Roll dough into small balls
- Create a gentle thumbprint in each cookie
- Fill centers with your favorite jam
Recipe card
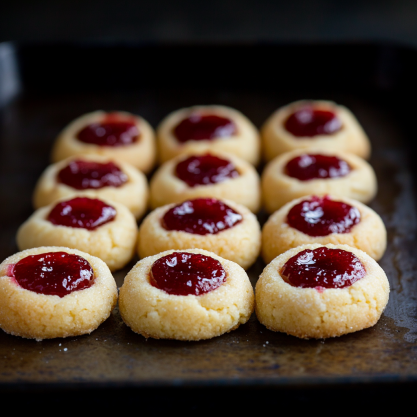
These buttery, melt-in-your-mouth cookies are perfect for any holiday gathering, with a sweet jam-filled center and a festive flair.
Kitchen Equipment:
- Baking sheet
- Parchment paper
- Electric mixer or stand mixer
- Small spoon or cookie scoop
- Thumb or small spoon (for making the indentations)
Ingredients:
For the Cookies:
- 1 cup unsalted butter, softened
- ½ cup granulated sugar
- 2 tsp vanilla extract
- 2 cups all-purpose flour
- ½ tsp salt
- ½ cup fruit jam (raspberry, strawberry, or apricot)
Instructions:
-
Preheat the Oven:
- Preheat your oven to 350°F (175°C).
- Line a baking sheet with parchment paper for easy clean-up.
-
Make the Cookie Dough:
- In a large mixing bowl, cream together the softened butter and sugar until light and fluffy (about 2-3 minutes).
- Add the vanilla extract and mix until incorporated.
- Gradually add the flour and salt, mixing until the dough just comes together.
-
Shape the Cookies:
- Roll the dough into 1-inch balls and place them on the prepared baking sheet, spaced about 2 inches apart.
- Use your thumb (or a small spoon) to make an indentation in the center of each cookie.
-
Fill the Indentation:
- Spoon about ½ teaspoon of jam into each indentation.
-
Bake the Cookies:
- Bake for 10-12 minutes, or until the edges are lightly golden.
- Let the cookies cool on the baking sheet for 5 minutes before transferring them to a wire rack to cool completely.
-
Serve & Enjoy:
- Once cooled, these cookies are ready to serve and enjoy during your holiday festivities!
Avoiding Common Baking Mistakes
When baking these Christmas cookies, avoid these common mistakes:
- Don’t overmix the dough, which can make cookies tough
- Ensure butter is at room temperature
- Use a precise measuring technique for ingredients
Pro Tips for Perfect Cookies
Professional bakers share secrets for amazing holiday cookies. Use these tips to make your thumbprint cookies even better:
- Use high-quality butter for rich flavor
- Chill dough before baking to prevent spreading
- Allow cookies to cool completely before serving
With practice, you’ll become a pro at making these holiday treats. They’ll become a family favorite.
Customization and Variations
Butter thumbprint cookies are a blank canvas for creativity. You can make each batch special with simple tricks. Try new flavors and fillings to make your cookie exchange unforgettable.
Adding a pinch of vanilla or almond extract can change the game. A sprinkle of citrus zest, like lemon or orange, adds a refreshing twist. For a touch of elegance, add cardamom or nutmeg, inspired by Danish pastries.
Flavor Enhancements to Try
Don’t be afraid to try new fillings for your thumbprint cookies. While jam is classic, you can also use chocolate ganache, salted caramel, or cream cheese. Nutella, fruit preserves, and even savory goat cheese can make your cookies stand out.
Serving Suggestions and Pairings
How you present your cookies matters. Try dusting them with powdered sugar or arranging them on a wooden board. Pair them with espresso, chai tea, or hot chocolate for a memorable treat.