
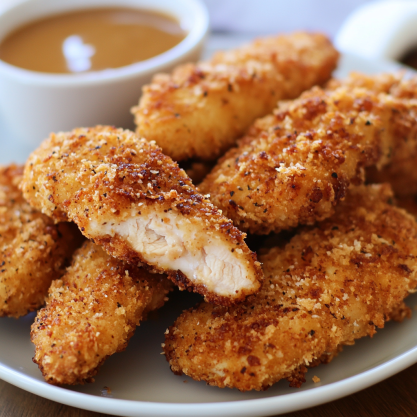
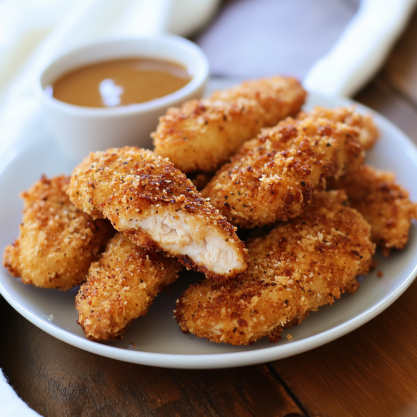
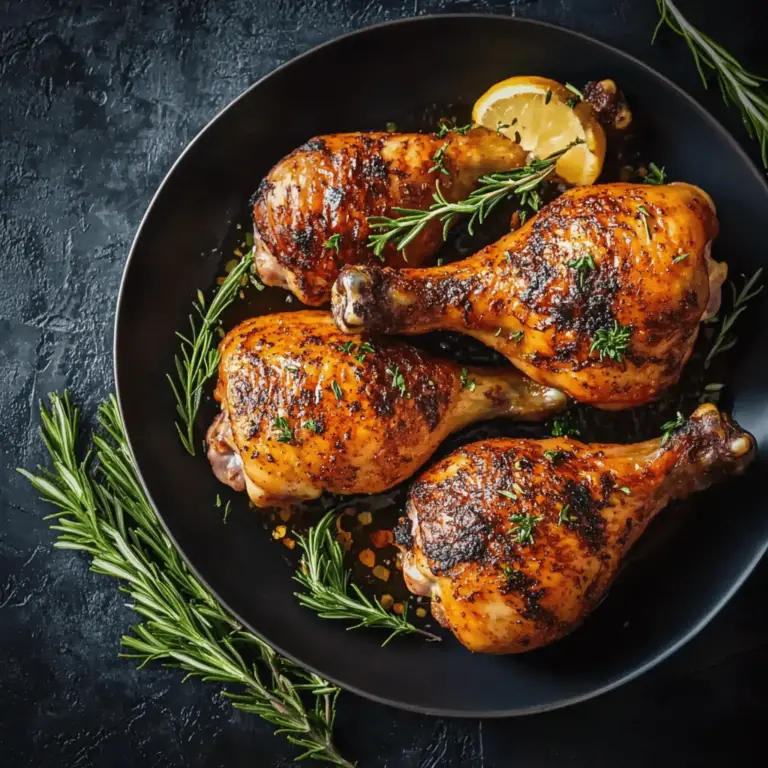
Crispy Homemade Chicken Tenders
Want a tasty meal without spending hours cooking? Homemade chicken tenders are perfect for busy families and food lovers. They can make your weeknight dinner special in just 30 minutes.
Making chicken tenders at home is more than saving time. It’s about enjoying a meal that’s fresh, healthy, and full of flavor. With just a few ingredients and some quick prep, you can make restaurant-quality chicken tenders in your kitchen.
Whether you’re new to cooking or experienced, this chicken tenders recipe will be your favorite. The key is in how you prepare and choose your ingredients. Get ready to learn how to make crispy, golden chicken tenders that everyone will love.
Why Choose Homemade Chicken Tenders?
Discovering homemade Healthy Chicken Tenders can change your family’s mealtime. Making these tasty treats at home has many benefits. It’s not just about the nutrition.
Creating Kid-Friendly Chicken Tenders at home gives you control over what goes into them. This makes them a healthy meal for everyone.
Healthier Alternative to Fast Food
Homemade chicken tenders are much healthier than store-bought or fast food. By choosing good ingredients and cooking methods, you can:
- Reduce excessive salt content
- Eliminate preservatives
- Control oil quantities
- Use lean protein sources
Customizable Ingredients for All Tastes
Kid-Friendly Chicken Tenders are very versatile. Families can adjust recipes to fit:
- Dietary restrictions
- Specific flavor preferences
- Gluten-free requirements
- Vegetarian alternatives
Cost-Effective Meal Solution
Making Healthy Chicken Tenders at home is not only healthy but also saves money. Buying ingredients in bulk and making lots at once can cut down on costs. This way, you get high-quality, tasty meals for your family.
Spending a bit of time on meal prep can save a lot of money and improve your diet.
Essential Ingredients for Perfect Tenders
Making delicious Boneless Chicken Tenders starts with picking the right ingredients. The secret to great results is in choosing and preparing them well. Whether you’re cooking at home or love to cook, knowing the key ingredients can make your dish amazing.
Choosing the Perfect Chicken Cut
For Panko Chicken Tenders, picking the right chicken is key. Look for fresh, high-quality chicken breasts that are:
- Uniform in thickness
- Free from excessive fat
- Preferably organic or free-range
Breading Options for Maximum Crunch
The breading is crucial for your chicken tenders. While regular breadcrumbs work, panko breadcrumbs add an extra crispy layer. Try these breading options:
- Classic flour coating
- Panko breadcrumbs
- Gluten-free alternatives like almond flour
- Crushed cornflakes for added crunch
Seasoning for Flavor Explosion
Make your Boneless Chicken Tenders taste amazing with the right seasoning. Try different herb combinations like:
- Garlic powder
- Dried thyme
- Smoked paprika
- Cayenne pepper for heat
Pro tip: Always season your breading mixture, not just the chicken, for maximum flavor impact!
Recipe card
Golden, crunchy, and tender on the inside—these homemade chicken tenders are easy, delicious, and perfect for any meal!
Kitchen Equipment:
- Three shallow bowls
- Baking sheet with wire rack (for baking option)
- Large skillet or deep fryer
- Tongs
- Paper towels
Ingredients:
For the Chicken:
- 1 lb chicken tenders or boneless, skinless chicken breasts (cut into strips)
- 1 tsp salt
- ½ tsp black pepper
- ½ tsp garlic powder
- ½ tsp paprika
For the Breading:
- 1 cup all-purpose flour
- 2 large eggs
- 2 tbsp milk
- 1 cup panko breadcrumbs (for extra crispiness)
- ½ cup grated Parmesan (optional)
- ½ tsp salt
- ½ tsp black pepper
For Frying:
- 2 cups vegetable or peanut oil
For Serving:
- Honey mustard, ranch, or BBQ sauce
Instructions:
-
Prep the Chicken:
- Pat the chicken dry and season with salt, pepper, garlic powder, and paprika.
-
Set Up the Breading Station:
- Bowl 1: Add flour and ½ tsp salt.
- Bowl 2: Whisk eggs and milk together.
- Bowl 3: Mix panko breadcrumbs, Parmesan (if using), and black pepper.
-
Bread the Chicken:
- Dredge each chicken strip in flour, then dip into the egg mixture, and finally coat with the breadcrumb mixture.
- Press gently to ensure the breading sticks.
-
Fry the Chicken Tenders:
- Heat oil in a skillet to 350°F (175°C).
- Fry chicken in batches for 3-4 minutes per side until golden brown and cooked through.
- Drain on a paper towel-lined plate.
-
Baking Option:
- Preheat oven to 425°F (220°C).
- Place breaded tenders on a wire rack over a baking sheet.
- Spray lightly with cooking oil and bake for 18-20 minutes, flipping halfway.
-
Serve & Enjoy:
- Serve hot with your favorite dipping sauces!
Step-by-Step Guide to Making Crispy Tenders
Making delicious Crispy Chicken Tenders at home is simple. This guide will show you how to turn plain chicken into a tasty meal. It’s as good as any restaurant’s.
Preparation: Marinating for Maximum Flavor
The key to great Baked Chicken Tenders is good preparation. Marinate your chicken in buttermilk or yogurt for 30 minutes to 2 hours. This makes the meat tender and adds flavor.
- Choose boneless, skinless chicken breasts
- Cut into uniform strips for even cooking
- Season marinade with garlic, paprika, and herbs
Coating Techniques for Crispy Perfection
To get that perfect crunch, choose the right coating. Mix breadcrumbs with parmesan cheese, dried herbs, and a bit of salt. This makes the outside extra crispy.
- Drain marinated chicken
- Dredge in seasoned flour
- Dip in beaten egg
- Roll in seasoned breadcrumb mixture
Cooking Methods: Baking for Health and Taste
Baking is a healthier way to cook chicken tenders without losing the crunch. Preheat your oven to 400°F. Place tenders on a wire rack for the best crispiness.
“The key to crispy baked chicken is high heat and proper air circulation.” – Professional Chef
Serving Suggestions: Elevate Your Meal
Enjoy your chicken tenders with tangy honey mustard, classic ranch, or spicy sriracha sauce. A fresh coleslaw or crisp green salad is a great side dish.
Tips for Storing and Reheating Chicken Tenders
Keeping your homemade buttermilk chicken tenders tasty is key. Smart storage and reheating are crucial. This way, you can enjoy them many times without losing flavor or crunch.
For storing leftovers, use airtight containers to keep them fresh. Refrigerate them within two hours of cooking. Eat them within 3-4 days. Make sure to place them in a single layer to avoid sogginess.
Best Practices for Storing Leftovers
To keep your chicken tenders crispy, wrap them in aluminum foil before storing. This stops moisture from getting in. A pro tip is to use parchment paper between layers to prevent sticking.
How to Reheat Without Losing Crispiness
Reheating chicken tenders can be a challenge, but the oven is the way to go. Heat it to 375°F and put the tenders on a wire rack over a baking sheet. This method keeps them crispy. Don’t use the microwave, as it can make them soggy.
Freezing Chicken Tenders for Future Meals
Freezing is great for meal prep. Cool the chicken tenders and put them in freezer-safe bags. Remove as much air as you can to keep them fresh for up to 3 months. To eat, thaw them in the fridge overnight and then reheat in the oven.